
(B1) Manage Class Group Resources
Learn how to add, organise, and share supplementary modules with your class using Class Group Resources.
(B1) Manage Class Group Resources
About Class Group Resources
Class Group Resources are Modules that are uploaded to the Class Group without assignment and do not have a due date. Teachers may use this feature to curate and share supplementary resources with students, for them to attempt on their own as self-study or meet different learner profiles.
Teachers in these groups may share, co-edit and curate the resources with each other. The resources may be added from My Drive, Library (MOE Library and Community Gallery), and Starred Resources. Teachers can also see the name of the teacher who is editing the class group resource when they try to resume or edit the resource.
Teachers may also create categories within Class Group Resources to better organise and filter the resources.
Note: When you delete, unpublish, or pause resources, any related notes and annotations that students have added to their notebooks will become unavailable to them.
Access Class Group Resources
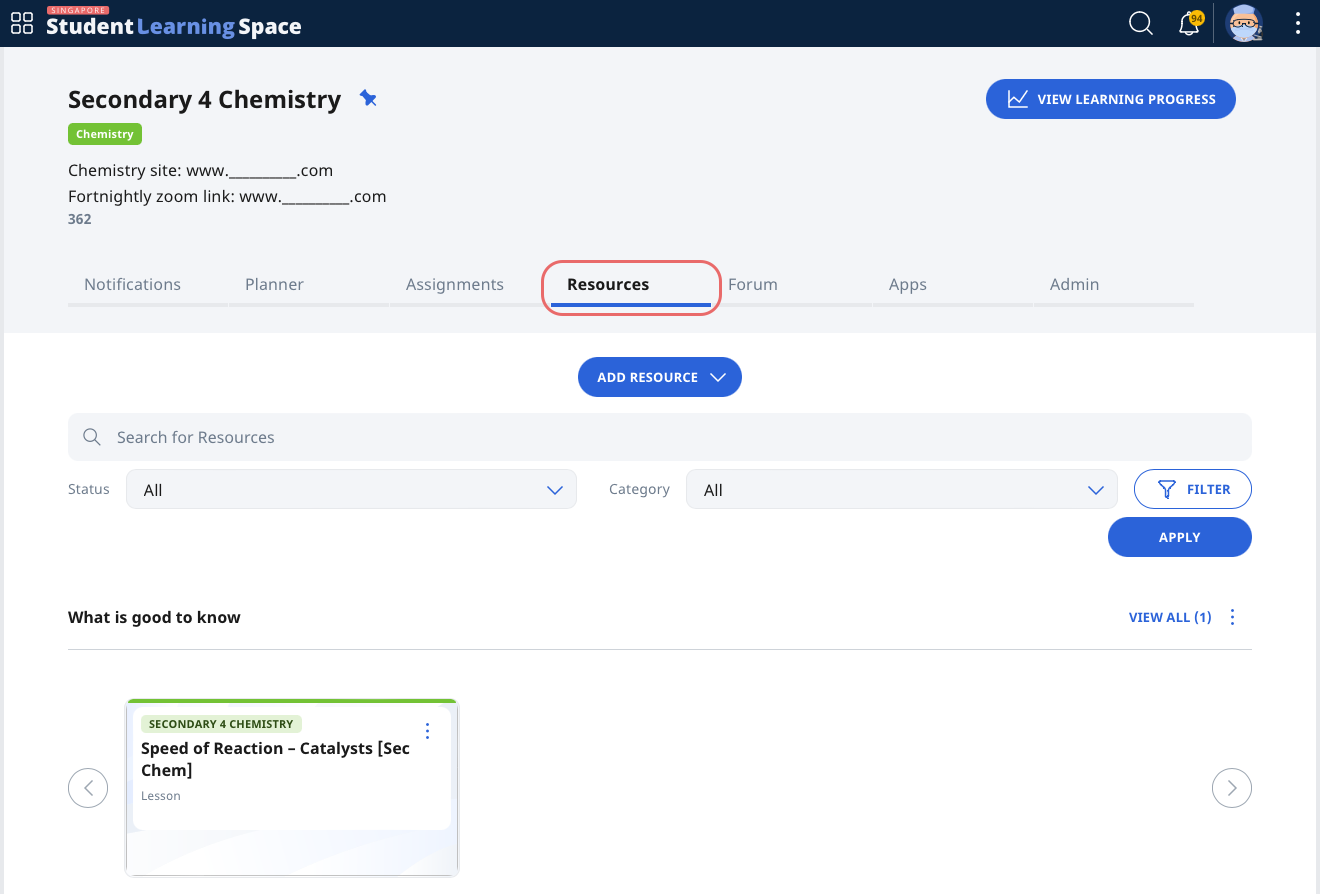
You can access Class Group Resources from the Class Group page.
In the specific class group, select the Resources tab.
Add Class Group Resources
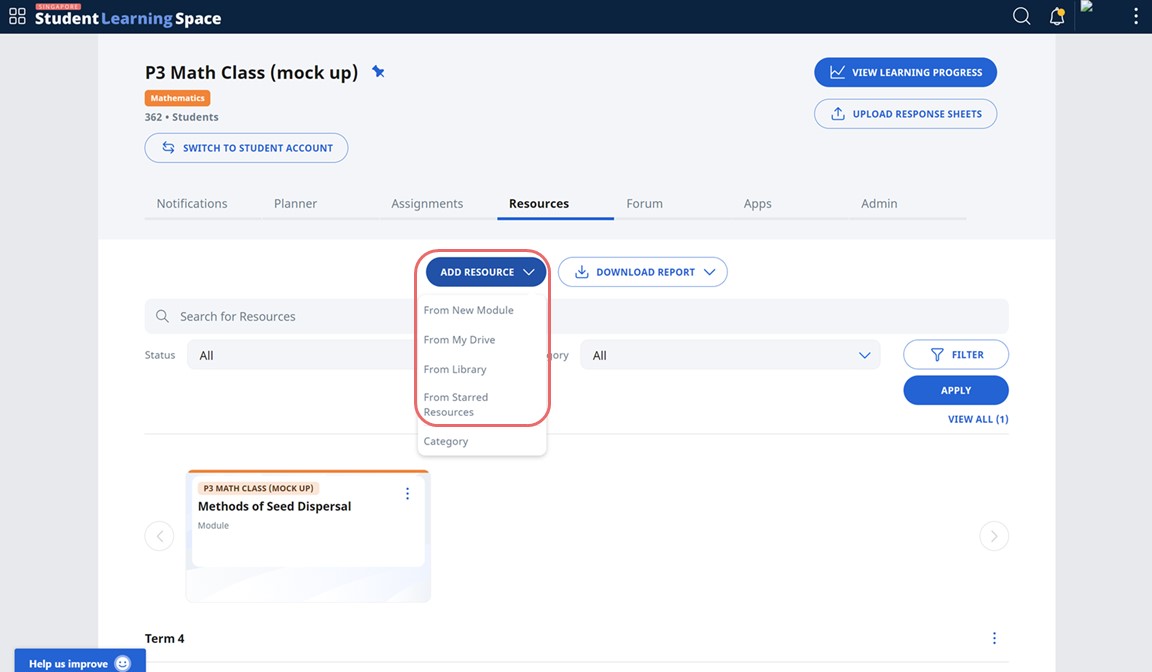
On the Resource tab in the class group, click Add Resource.
Select where the resource is located: New Module, My Drive, Library (MOE Library and Community Gallery), Starred Resources.
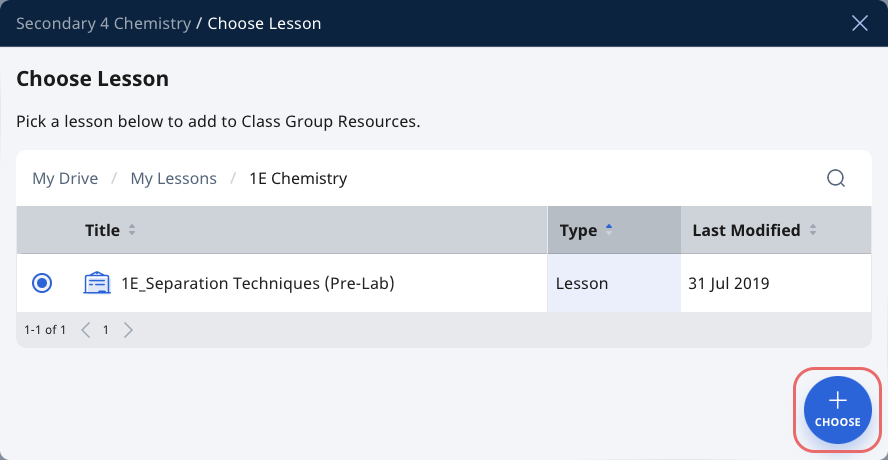
For resources found in My Drive or Starred Resources, navigate to the right folder (for My Drive only), select the file you wish to add, and click Choose.
For resources found in Library (MOE Library and Community Gallery), you can search by entering the title of the resource into the search field.
Click the Module card to add the Module as a Class Group Resource.
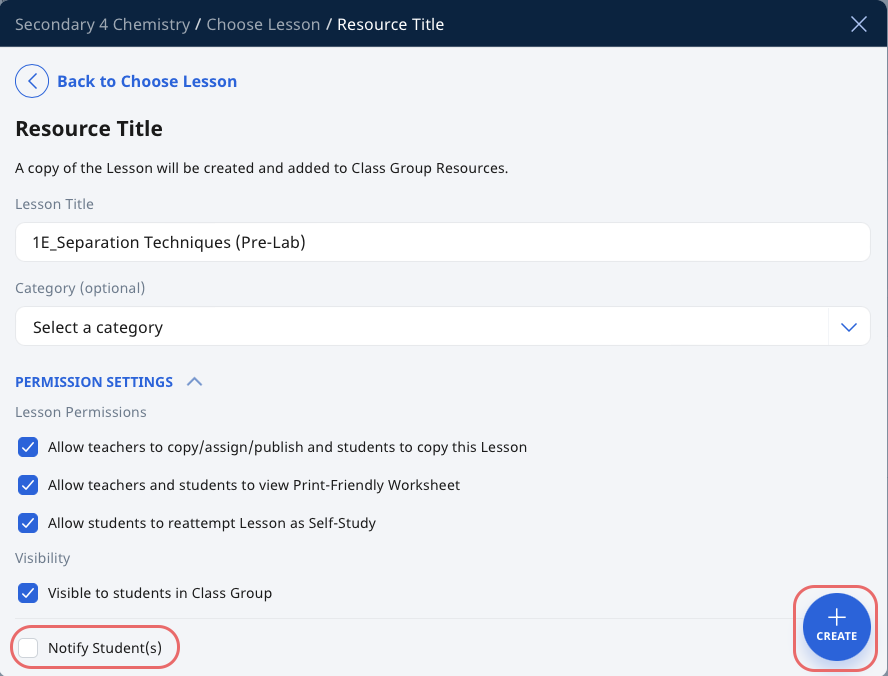
From the Resource Title subpage, teachers can edit the Resource Title and add the resource into a Category.
Select the checkbox to enable visibility to students in the Class Group. You may also choose whether to notify the student. Click Create.
Note: For MOE Library resources, permission to make a copy has to be enabled in order for the Resource to be added to Class Group Resources.
Create Categories
On the Resource tab in the Class Group, click Add Resource and select Category.
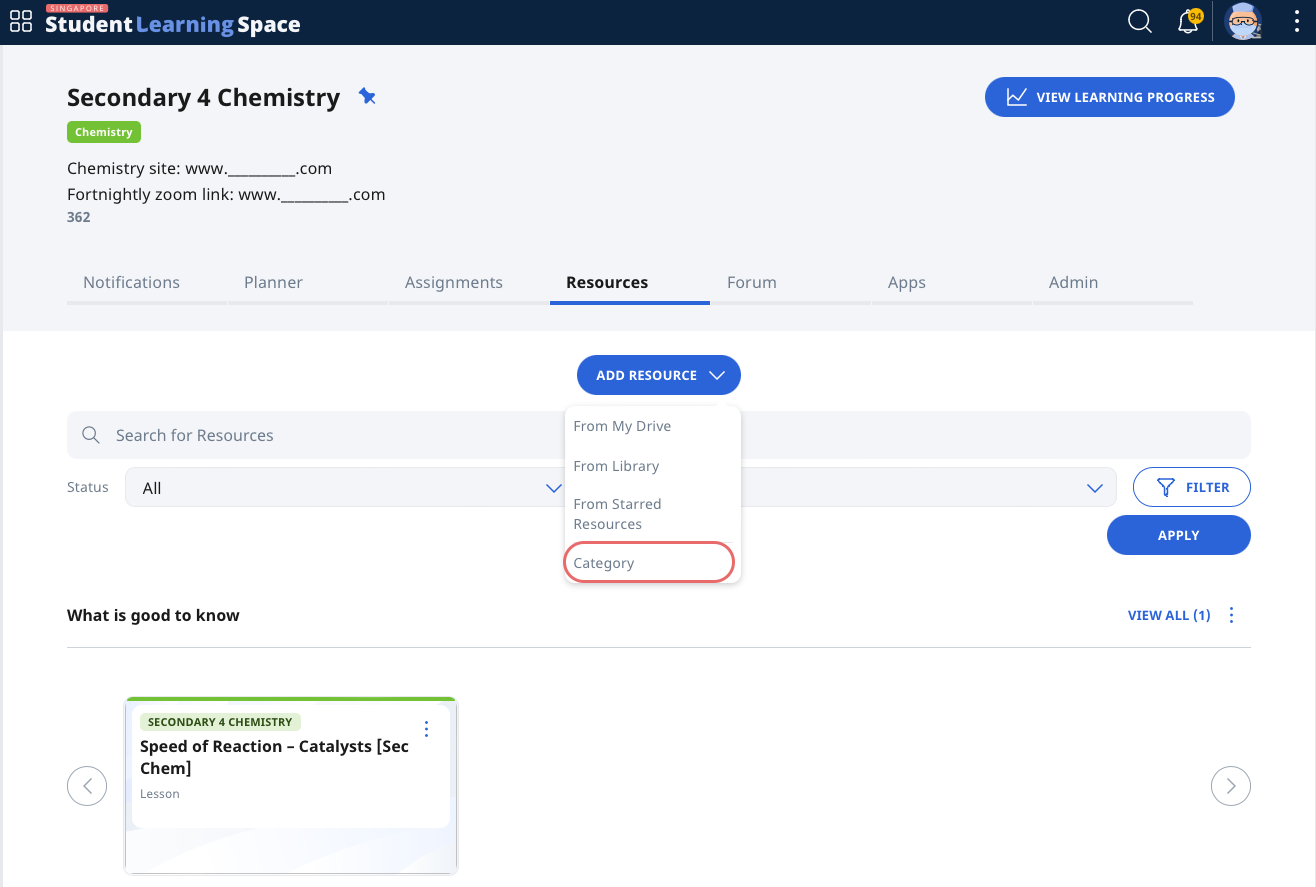
Enter the name of the category. Click Add.
Move Resource to Another Category/Class Group
On the Resource tab in the Class Group, locate the Resource card for the resource you wish to move. You may also use the search feature to locate the resource.
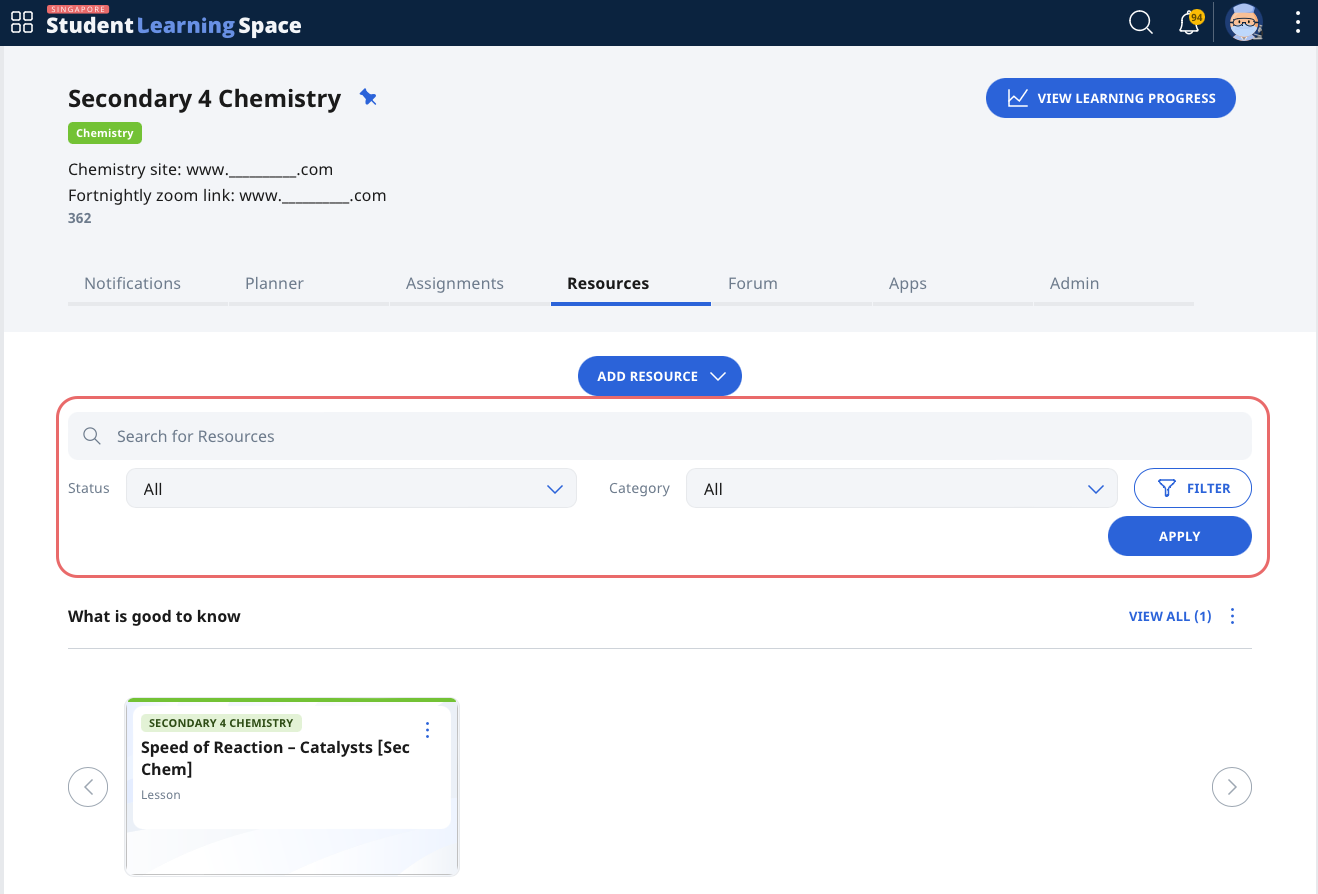
Click the Overflow (3-dot icon) on the Resource card for the resource you wish to move. Select Move to Category to move the resource to another Category, Uncategorise the resource or Move Resource to move the resource to another Class Group.
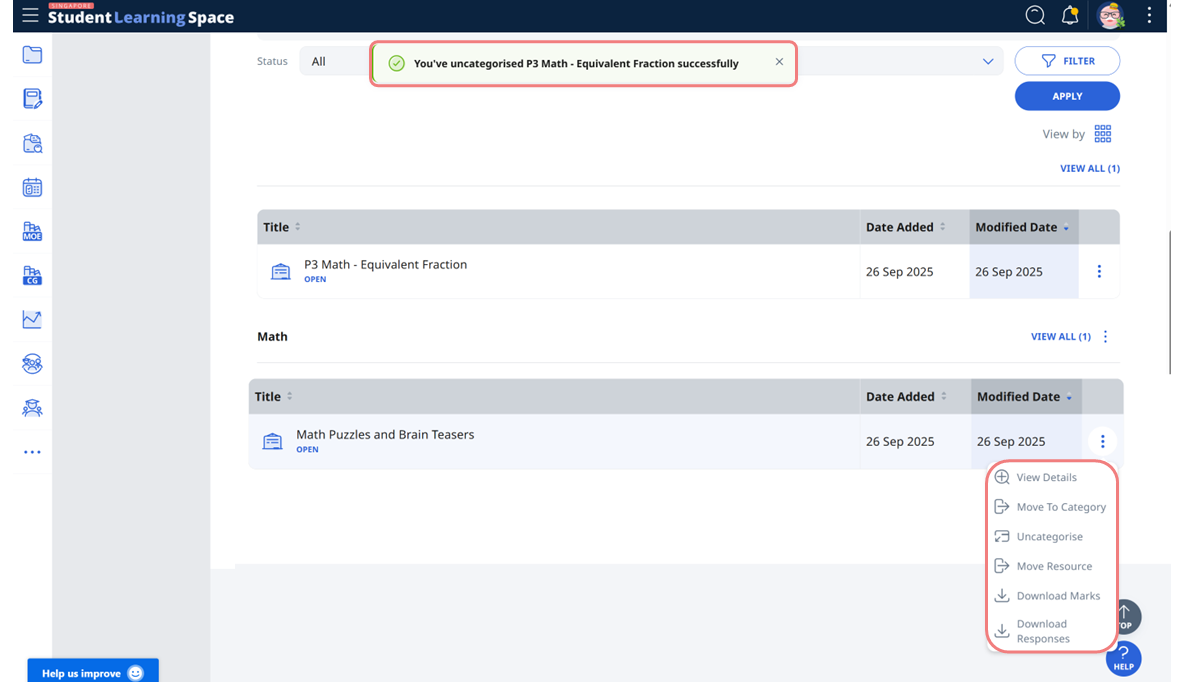
Note: A temporary message will appear when the resource has been successfully:
Moved to another category
Uncategorised
Moved to another Class Group