

My Notebooks (New)
My Notebooks (New)
About My Notebooks
Students can create their own notebooks for note-taking and add notes from assignments, consolidating everything in one place. They can also organise their notebooks into categories, making it easy to locate and build upon their notes, which helps make revision more effective.
Create a Notebook
-
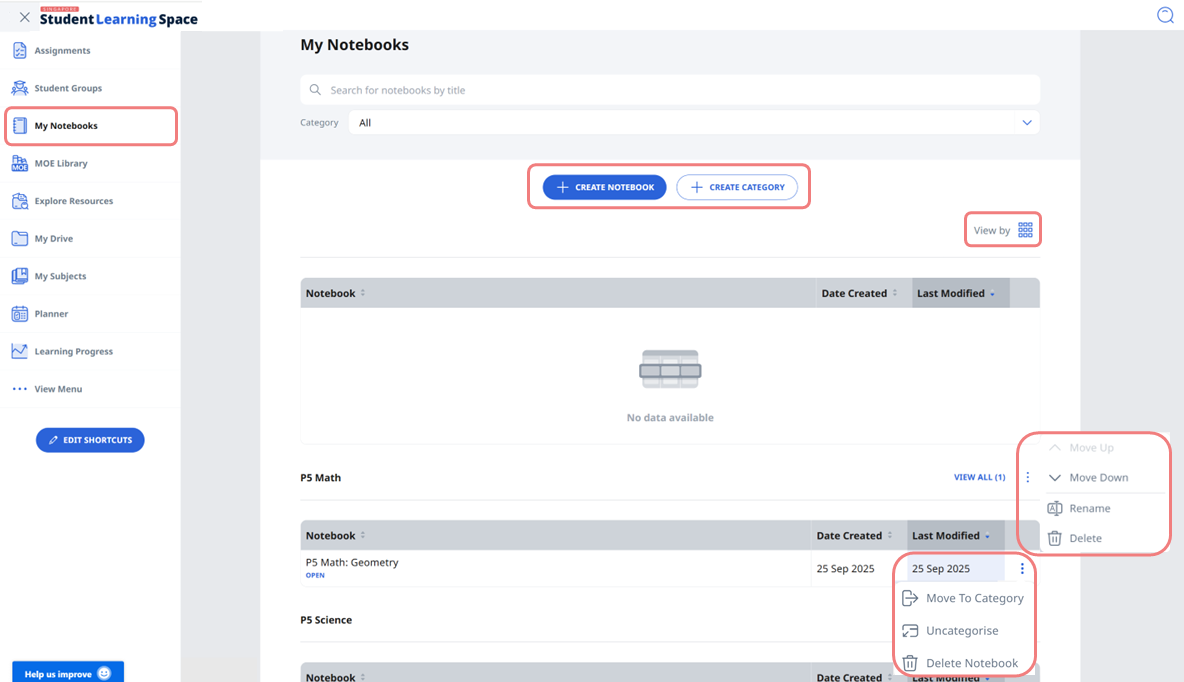
Open the left menu and select My Notebooks. To pin it to the menu, click Edit Shortcuts, select My Notebooks under Shortcuts available, and click Save.
-
Click Create Notebook to start a new notebook. You can also search by notebook title and filter by category in the notebook listing. For each notebook, click the overflow (3-dot) icon to move it to another category, uncategorise, or delete it.
-
Your notebooks will appear in List view by default. You can choose to view your notebooks in Card view by clicking on the note card icon.
-
Click Create Category to organise your notebooks. For each category, click the overflow (3-dot) icon to move, rename, or delete it.
-
-
After creating a new notebook, enter the title, upload an image as cover, and add a description. Click anywhere outside the component to auto-save. To make changes later, click the pencil icon.
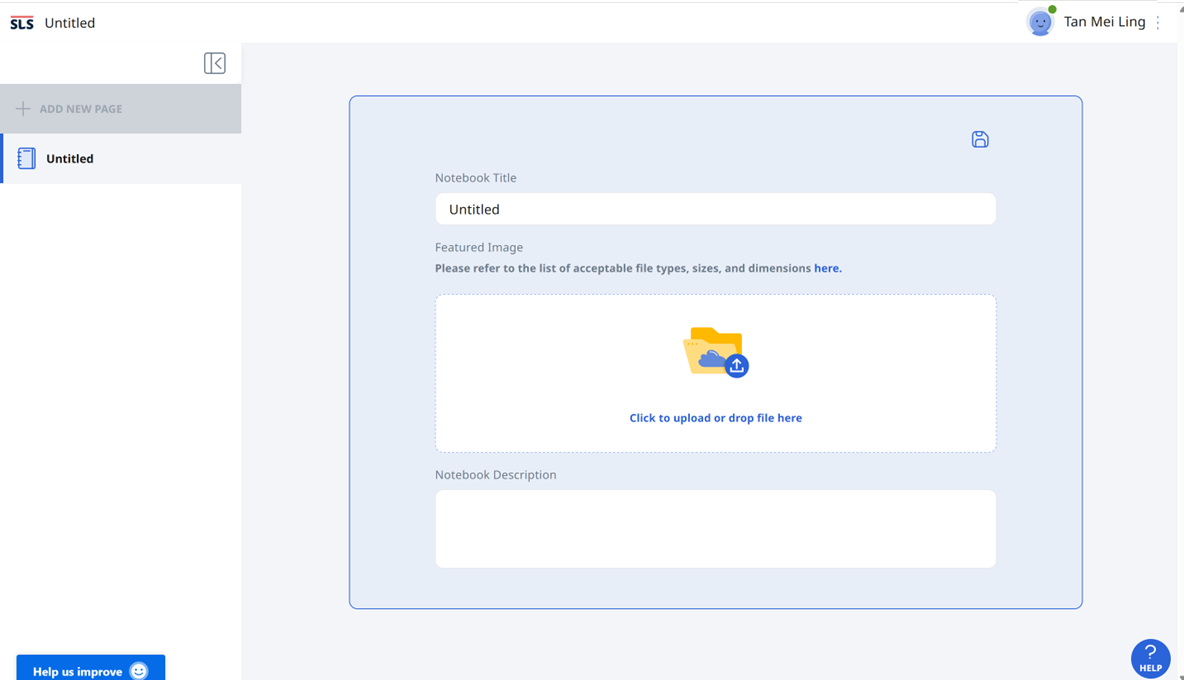
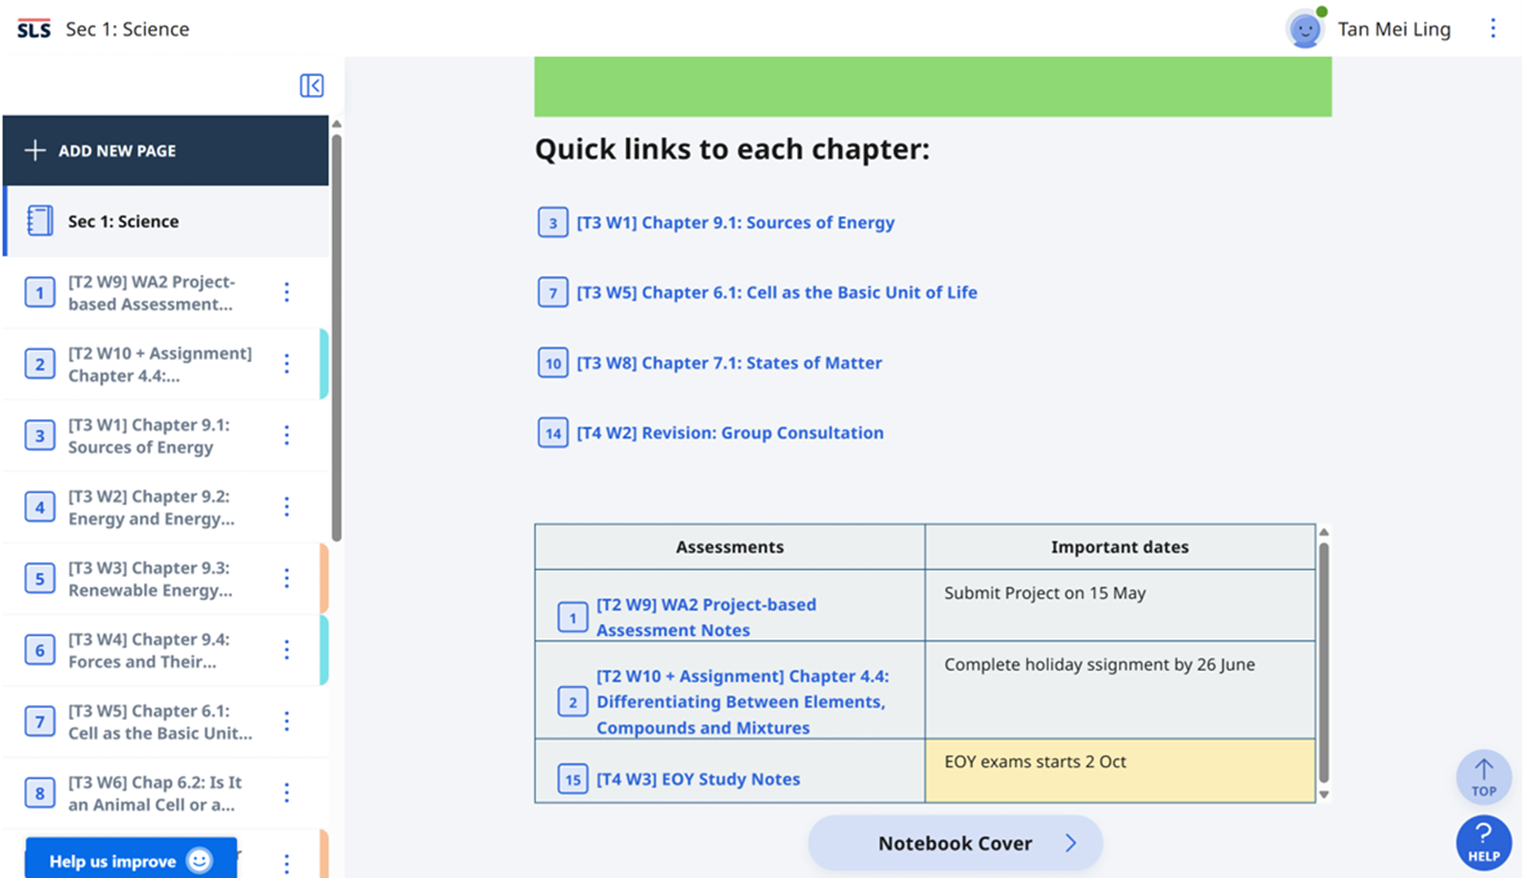
Note: After organising your notes, you can create a contents page on the notebook cover by inserting links to other notebook pages in the description section.
-
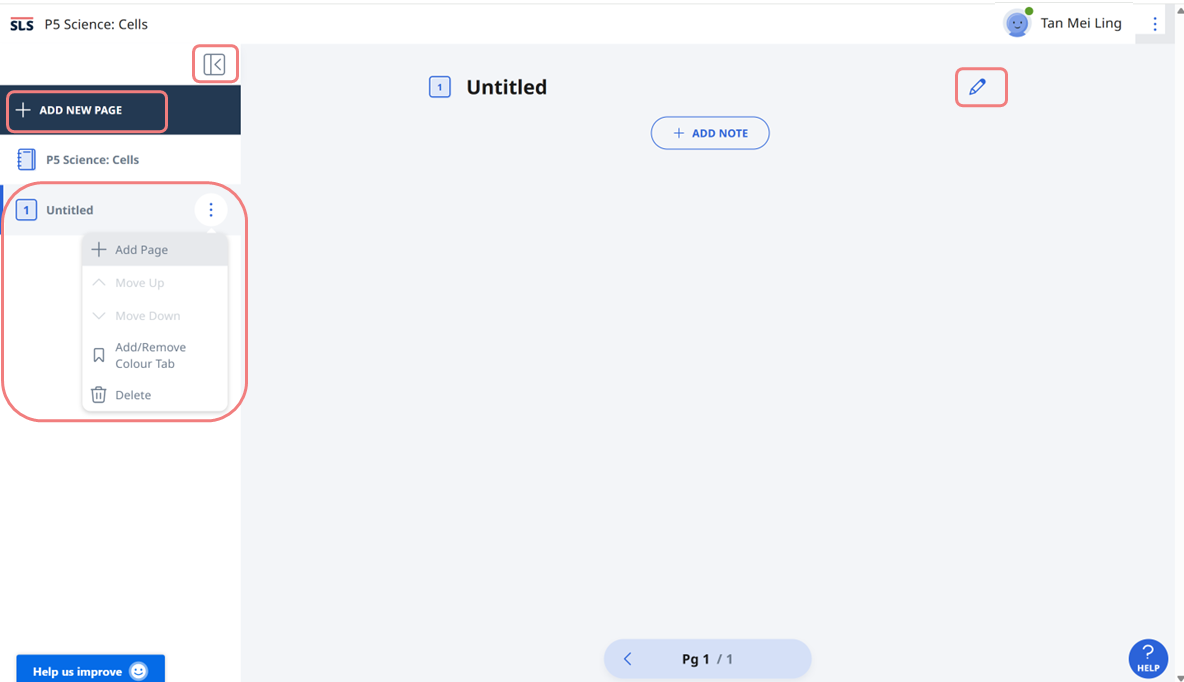
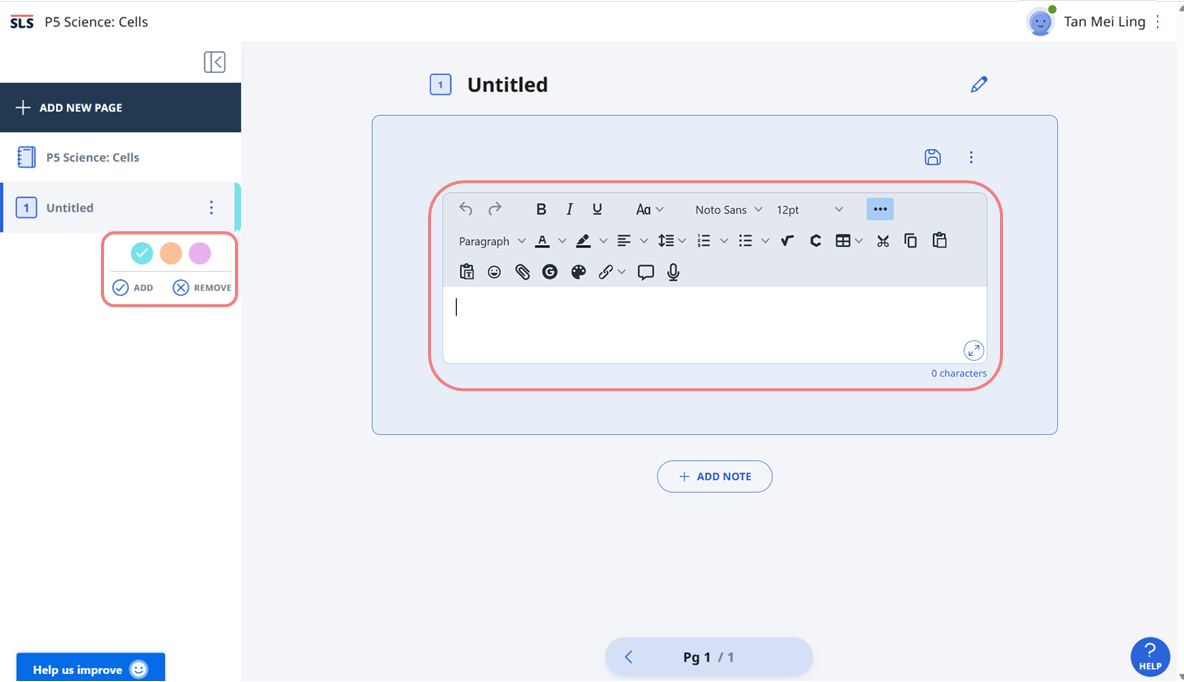
Expand the drawer and click Add New Page to insert pages into the notebook. Navigate between pages using the bottom navigation bar.
-
Click the pencil icon to edit the page title, or use the overflow (3-dot) icon to add/move a page, add/remove colour tab, or delete the page.
-
For the colour tab, you can choose from three colours. Use them to organise your pages or spotlight certain pages—for example:
-
Blue: Key concepts, exam topics
-
Orange: Revision or review required
-
Pink: Connection between chapters, reflections
-
-
-
Click Add Note to add content to each page. Click the 3-dot icon to expand or collapse the Rich Text Editor and use its tools to insert content. Learn more about the Rich Text Editor here.
-
To view and print all pages in a continuous format, open the right menu and select View as Print-Friendly Notebook.
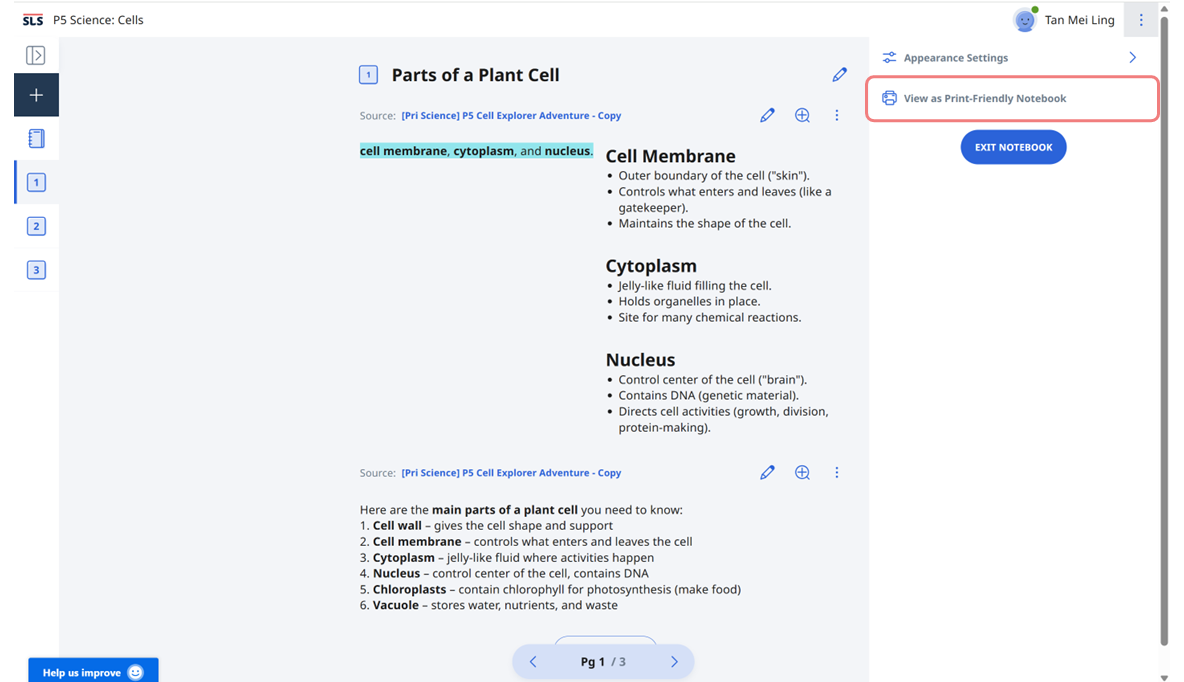
Note: You can also adjust the appearance settings: wide or standard view.
Add Notes from Assignments or Self-Study modules into a Notebook
-
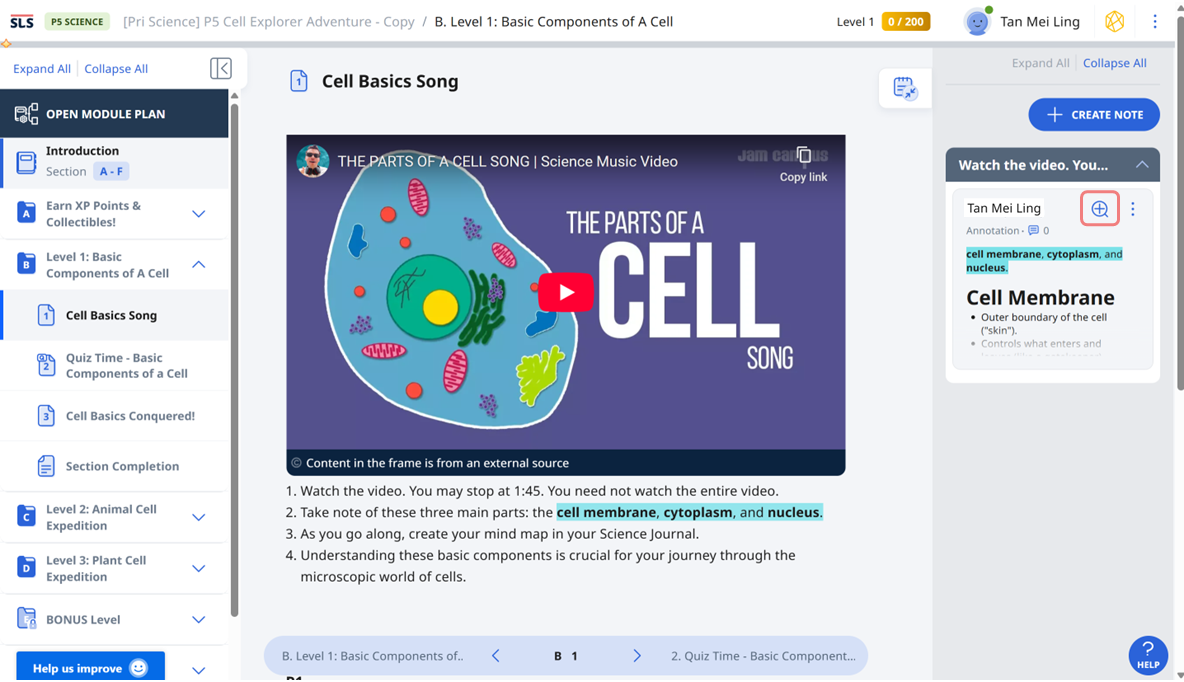
In an assignment or self-study module, click the Magnifying Glass icon to view the notes.
-
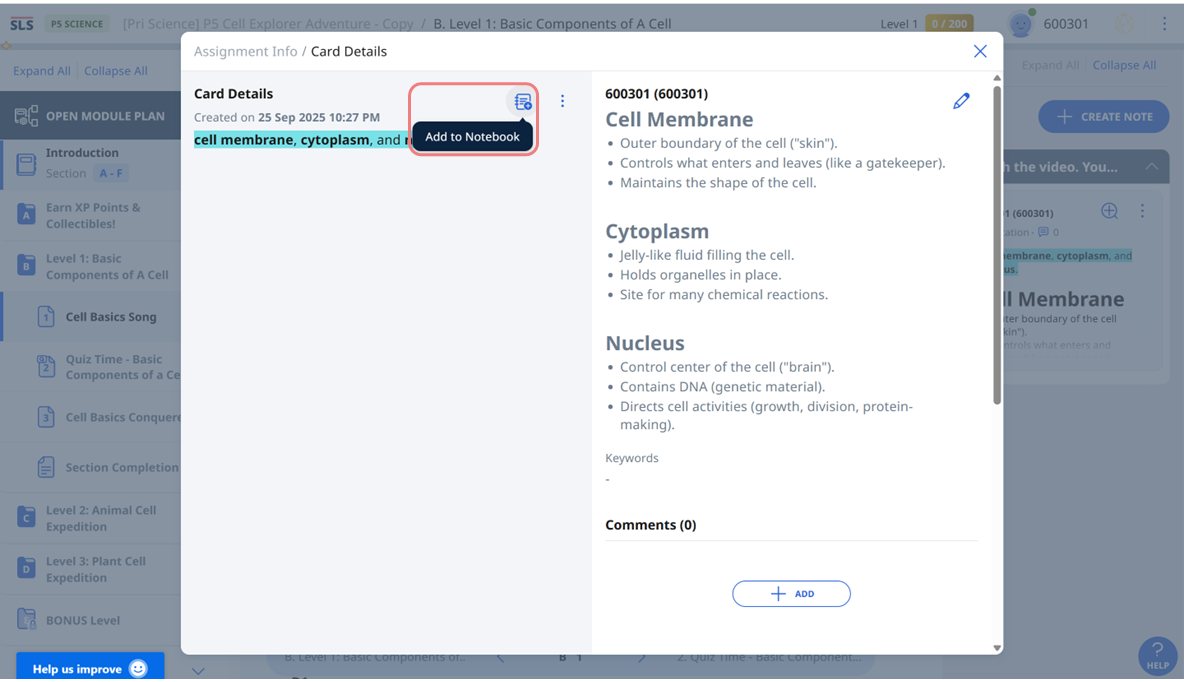
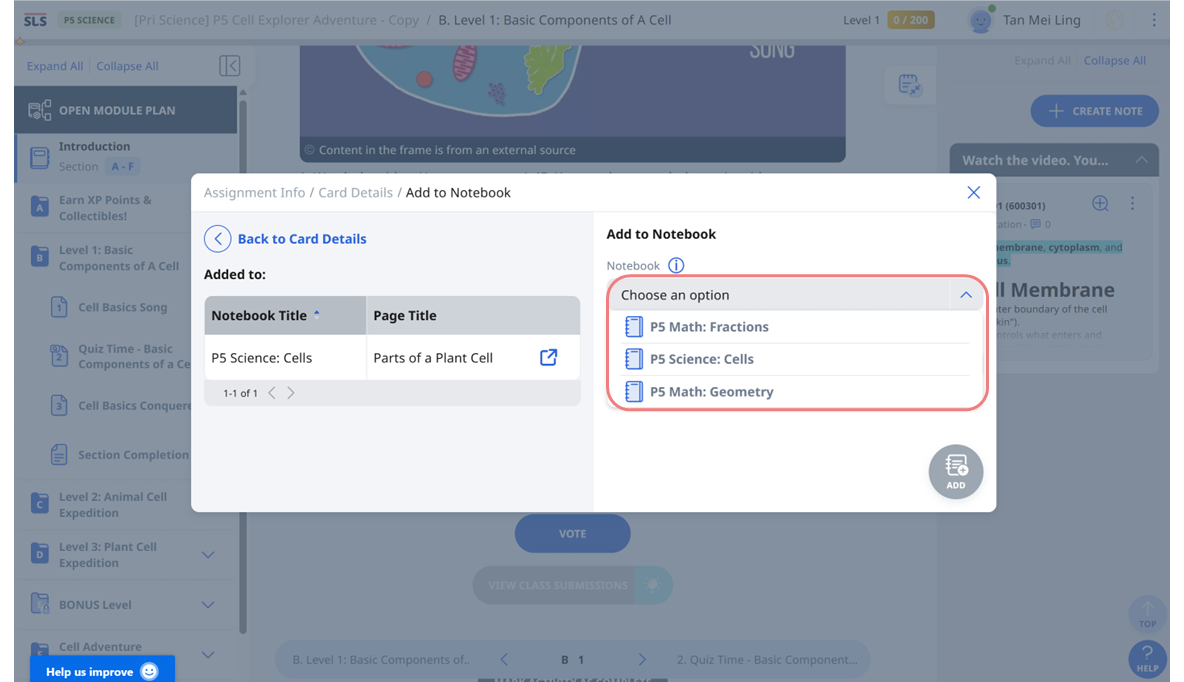
To add the notes to a notebook, click Add to Notebook.
-
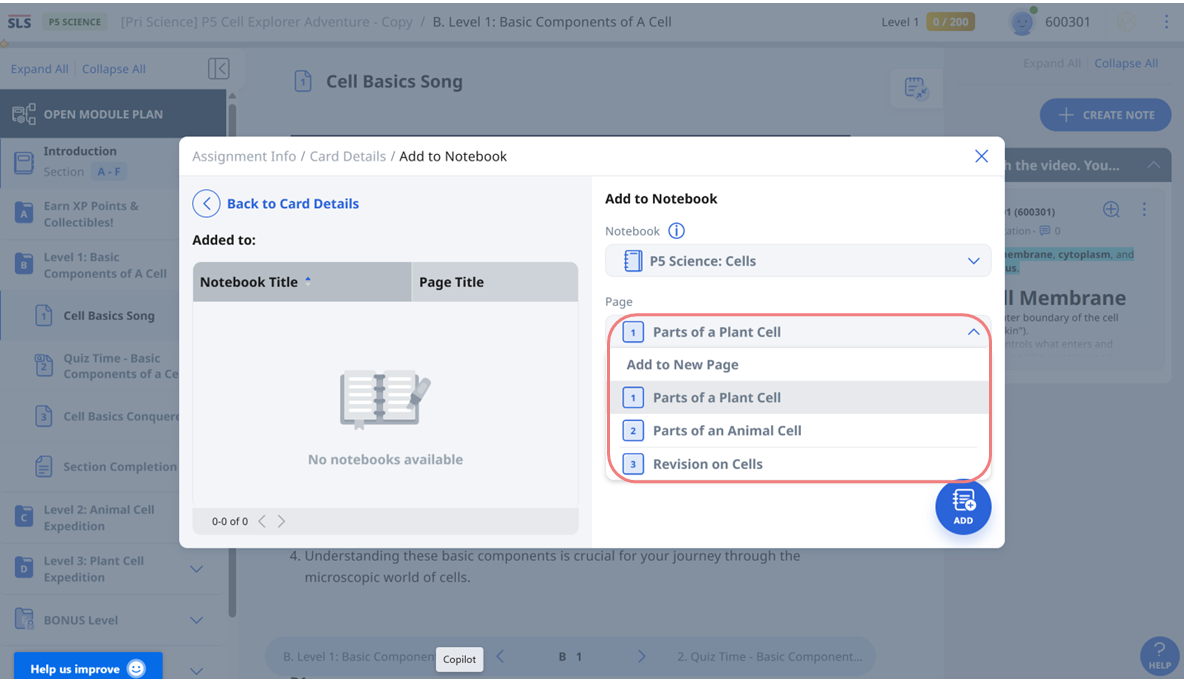
Select the notebook where you want to add the notes. If the notes have already been added to a notebook, it will appear under “Added to”.
-
Select the page to add the notes to, then click Add to confirm.
-
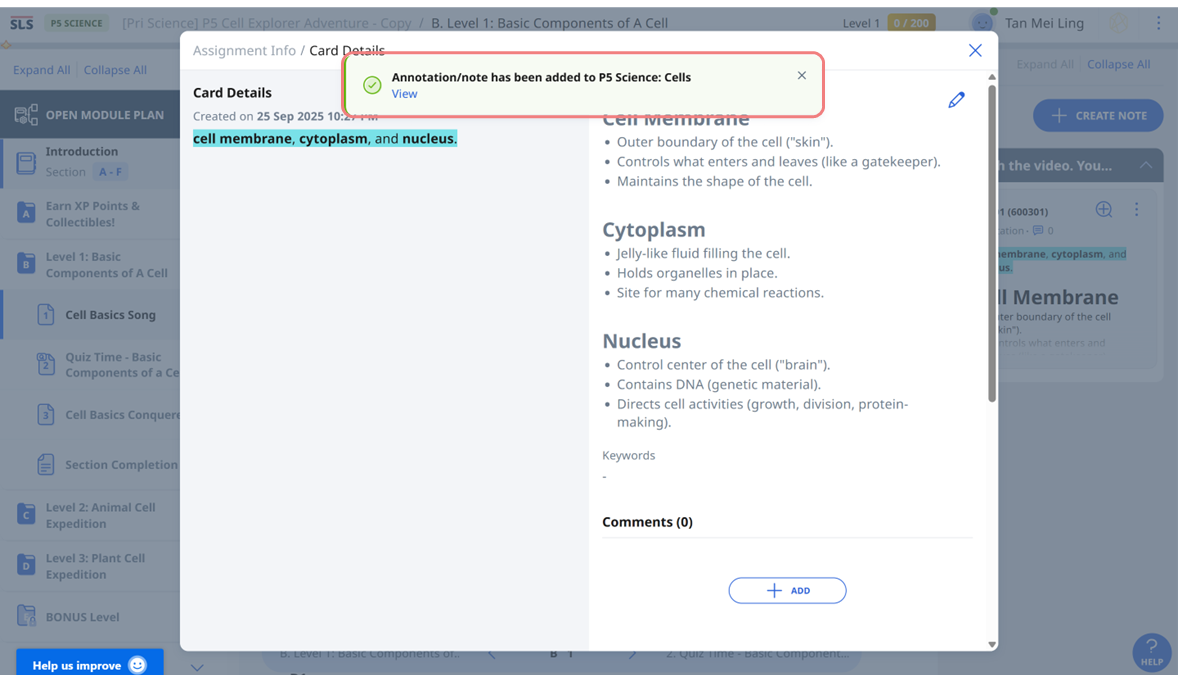
A temporary message will appear when the notes have been successfully added to the page. You can click on the ‘View’ to open the notebook in a new tab.
-
Alternatively, you can open the left menu and select My Notebooks. Go to the notebook to view the newly added notes. Content in the notebook:
-
Source showing the title of the assignment/self-study module (as a URL linking back to the module)
-
Annotated text or media object (if any)
-
Self-created notes
-
Ways to manage or organise the notes:
-
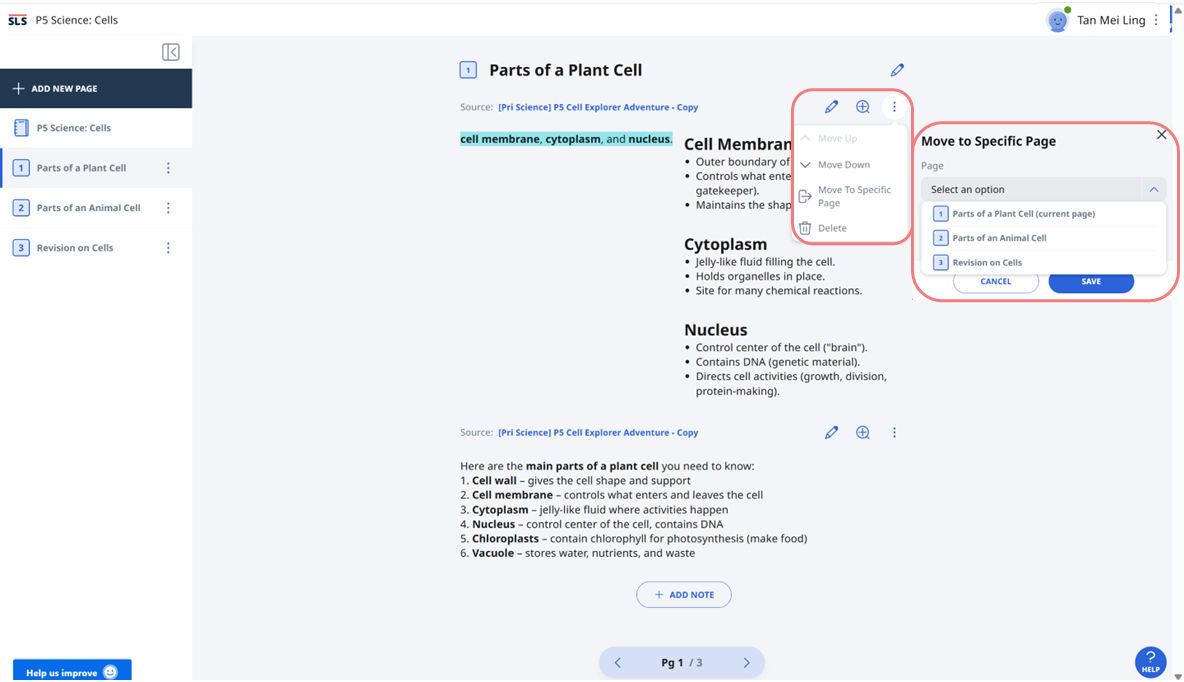
Click the overflow (3-dot) icon to move the notes, move them to a specific page within the same notebook, or delete them.
-
When moving the notes to a specific page, select the page from the dropdown list and click Save to confirm.
-
Click the pencil icon to edit the notes.
-
Note:
-
When notes are edited in either My Notebooks or Assignment/Self-study module, the changes will be reflected in both.
-
New notes will always be added below the existing notes.
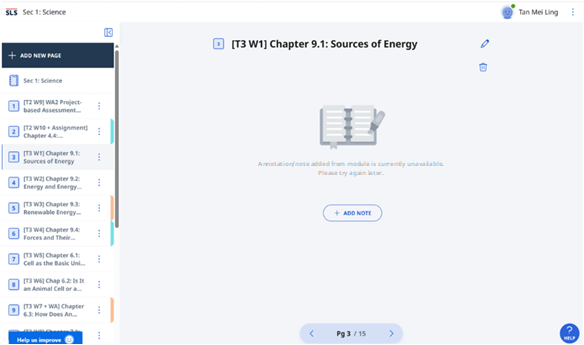
Unavailable Notes or Annotations
A placeholder will be displayed when notes or annotations become unavailable because you have lost access. This could be due to some of the following reasons:
-
The notes or annotations in the assignment or resource have been deleted by the owner.
-
The assignment or resource has been deleted or unpublished.
-
The assignment or resource has been paused by the teacher.
Note: You should check again before removing such notes or annotations from your notebook.