(A2,2) Add Split Page Media (Enhanced)
(A2,2) Add Split-Page Media (Enhanced)
Add Split-Page Media
-
In the Module Editor page, hover over Text/Media in the Component Bar.
-
Select Split-page Media and upload a file,
-
Drag and drop a file into the box; or
-
Click on the box and select a file through the file manager.
-
-
The uploaded PowerPoint, video or audio file will be split across pages with the first slide or video/audio clip be added to the page where you select Split-page Media.
-
Note: You are unable to add split media between two existing Components.
-
You can add up to 100 pages/components in an activity.
-
The acceptable file sizes are:
-
Powerpoint: 50MB
-
Video: 500MB
-
Audio: 50MB
-
Add Split-Page PowerPoint
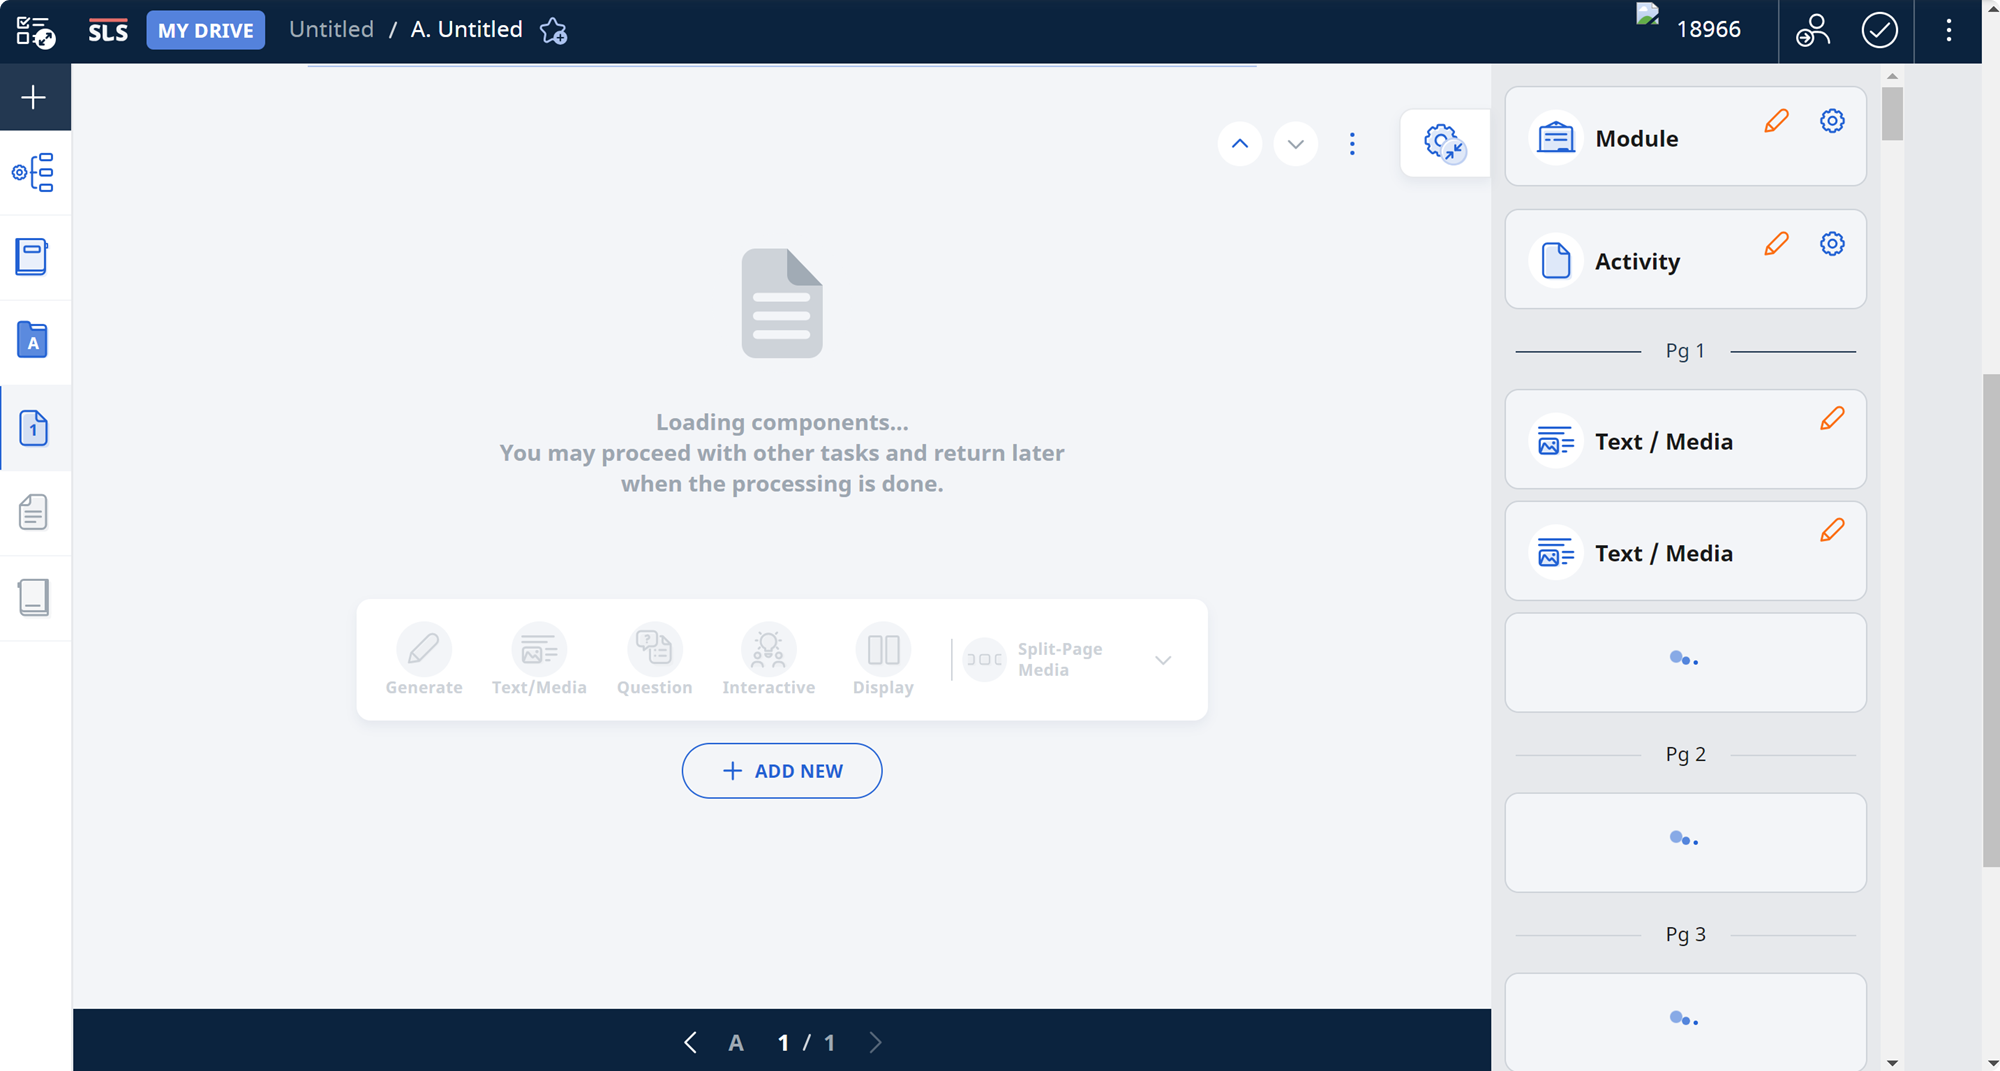
Each slide will be converted into an image on the page within an activity. If a range of slides is chosen, page placeholders will be shown based on the number of slides selected, allowing teachers to navigate elsewhere while the media is being processed.
Important:
-
The converted images cannot be edited with the drawing tool or downloaded separately.
-
Save and upload your file as PowerPoint Picture Presentation (*.pptx) for consistency.
-
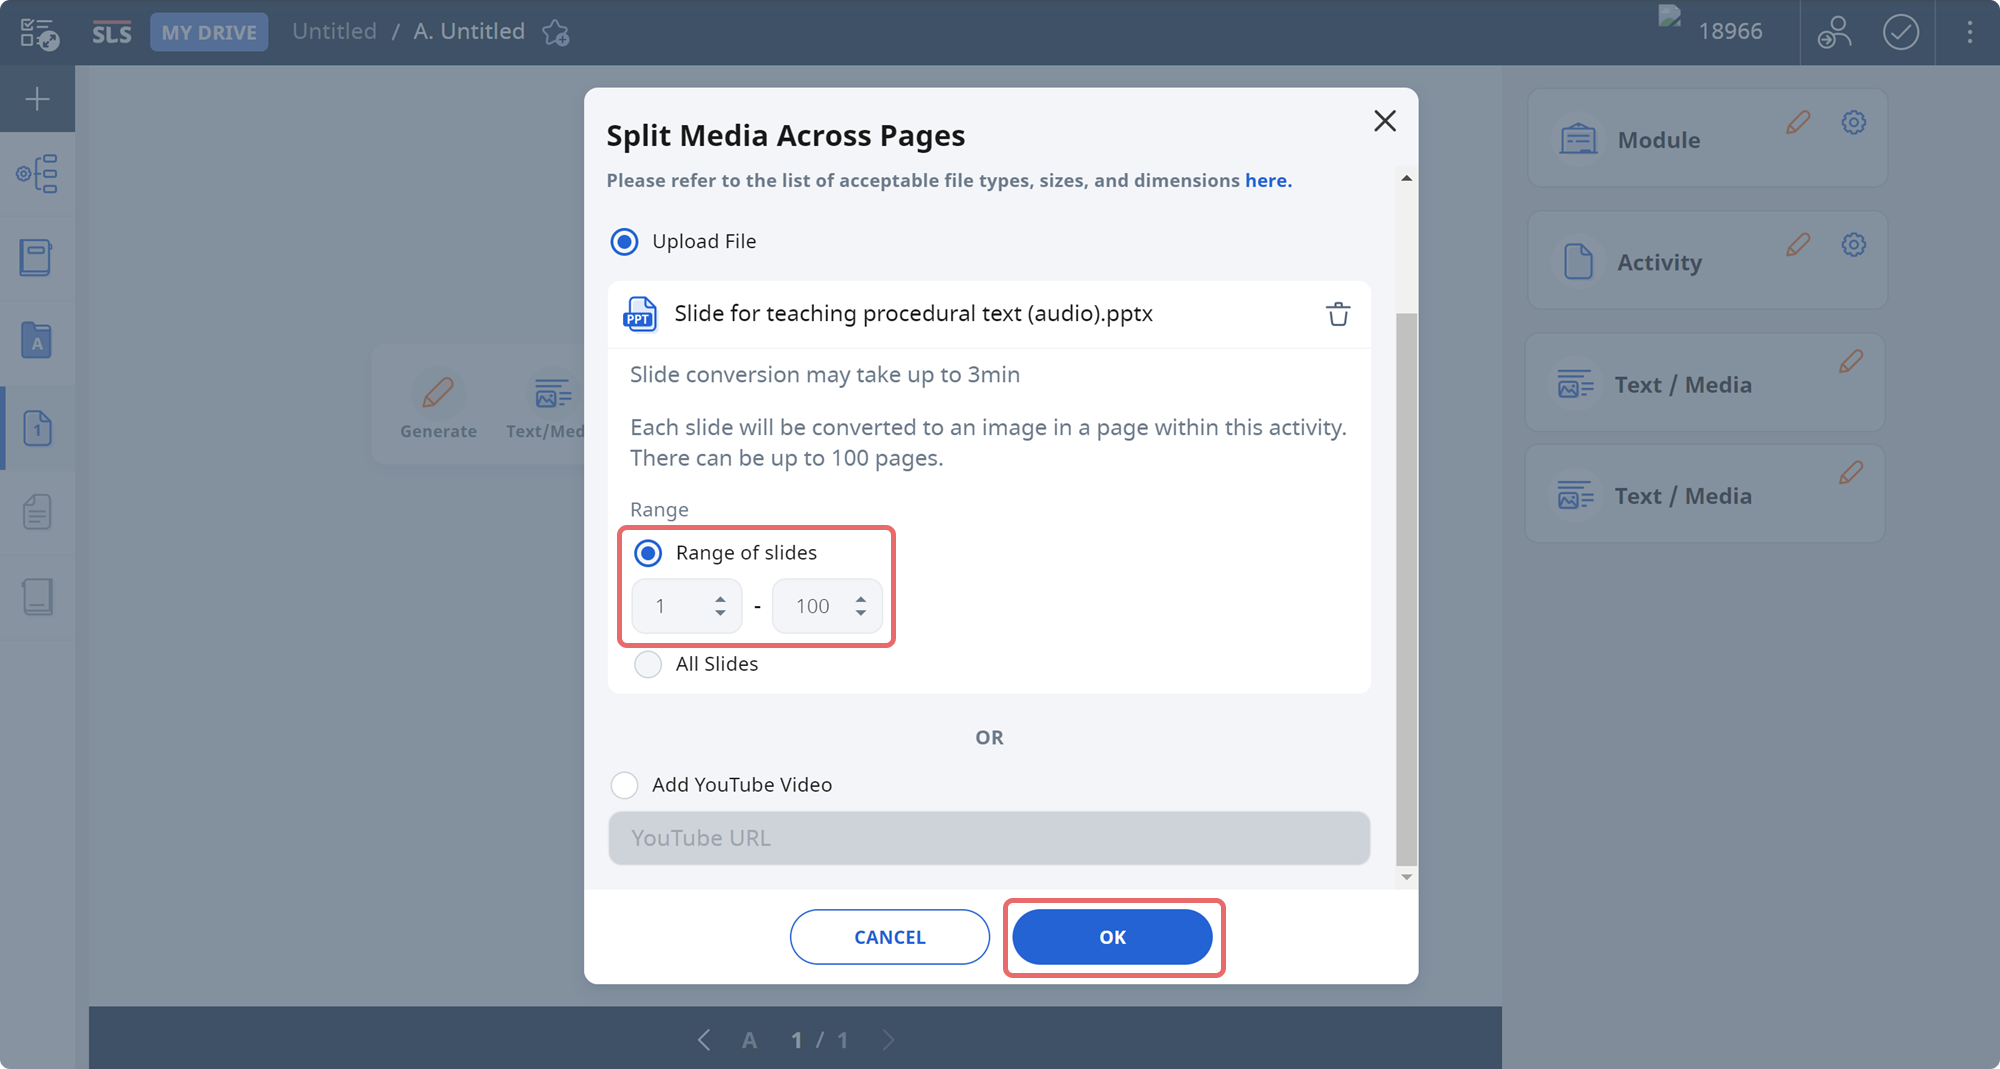
After you upload the file, you may choose to split-page all the PowerPoint slides or choose a range of slides to be split.
-
Click OK to proceed.
Note: Currently the following limitations apply:
-
Chinese and Tamil characters are not supported.
-
Supported Fonts:
-
Bitstream Charter
-
Century Schoolbook L
-
Courier 10 Pitch
-
Cursor
-
DejaVu
-
Dialog
-
DialogInput
-
Dingbats
-
Hershey
-
Monospaced
-
Nimbus Mono L
-
Nimbus Roman No9 L
-
Nimbus Sans L
-
SansSerif
-
Serif
-
Standard Symbols L
-
URW Bookman L
-
URW Chancery L
-
URW Gothic L
-
URW Palladio L
-
Utopia
-
-
Some types of shapes are not yet supported, e.g. WordArt, complex auto-shapes
-
Only Bitmap images can be rendered in Java, e.g. PNG, JPEG, DIB
-
Add Split-Page Video
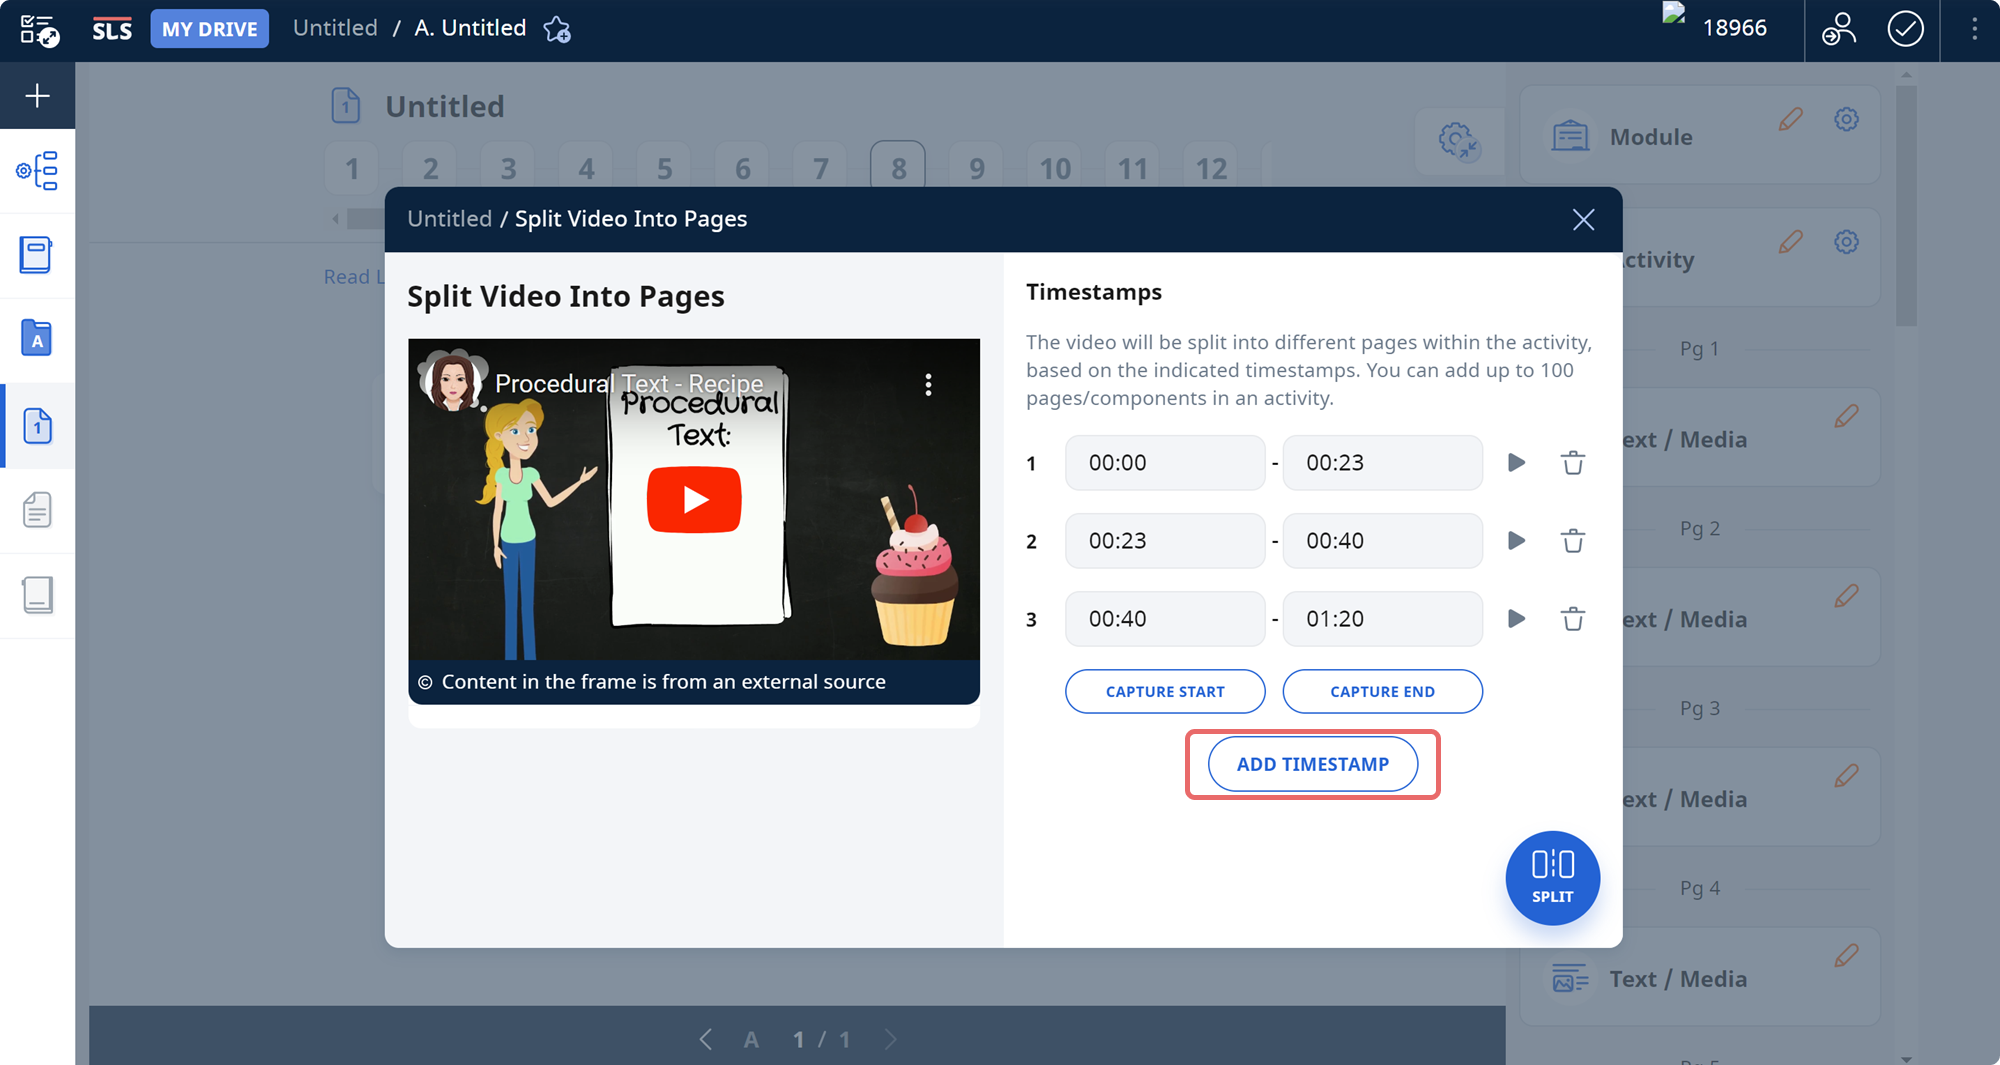
The video will be split across different pages within the activity, based on the indicated timestamps.
-
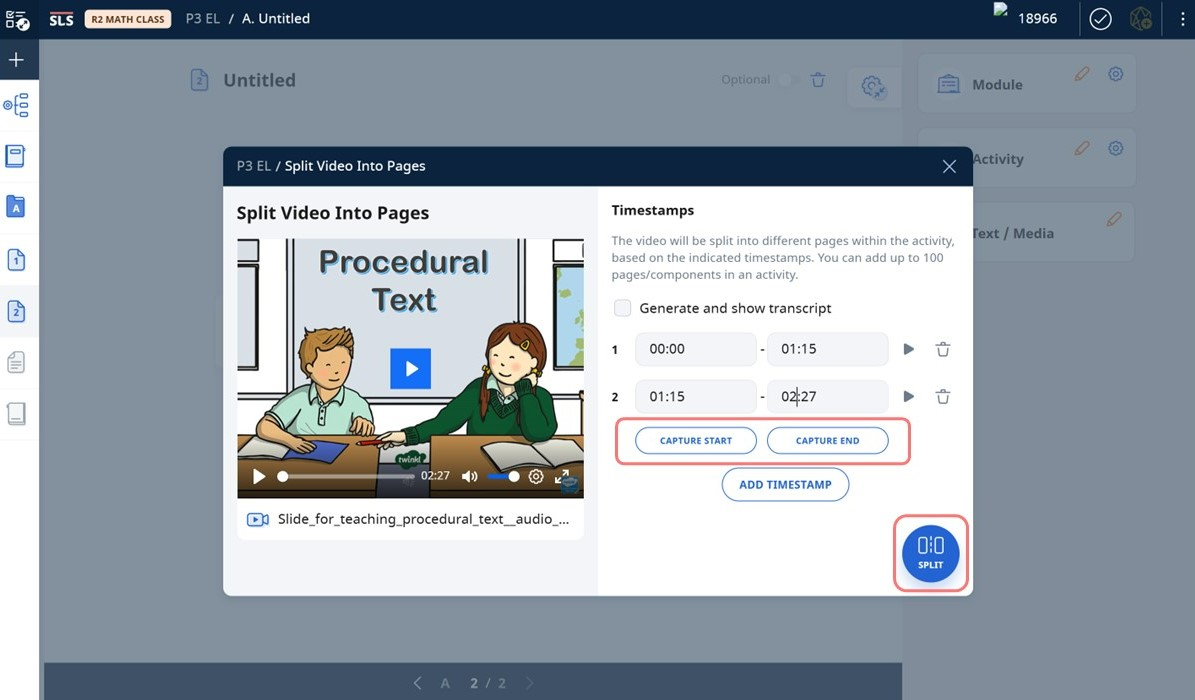
After you upload the file, you can set your preferred start and end times for the video playback. There are two ways to do this:
-
Enter the time into the text box in HH:MM:SS or MM:SS format.
-
Play the video in the preview section. When the video reaches the desired start time, click on Capture Start. The text box will be updated with the current position of the video along the timeline. You can do the same with Capture End to set an end time.
-
-
You can Add Timestamp to split the video into multiple pages.
-
Click Split and OK to proceed.
Add Split-Page Audio
The audio will be split across different pages within the activity, based on the indicated timestamps.
-
After you upload the file, you can set your preferred start and end times for the audio playback. There are two ways to do this:
-
Enter the time into the text box in HH:MM:SS or MM:SS format.
-
Play the audio in the preview section. When the video reaches the desired start time, click on Capture Start. The text box will be updated with the current position of the video along the timeline. You can do the same with Capture End to set an end time.
-
-
You can Add Timestamp to split the audio into multiple pages.
-
Click Split and OK to proceed.
Add Split-Page YouTube Video
The YouTube video will be split across different pages within the activity, based on the indicated timestamps.
-
In the Module Editor page, hover over Text/Media in the Component Bar and select Split-Page Media.
-
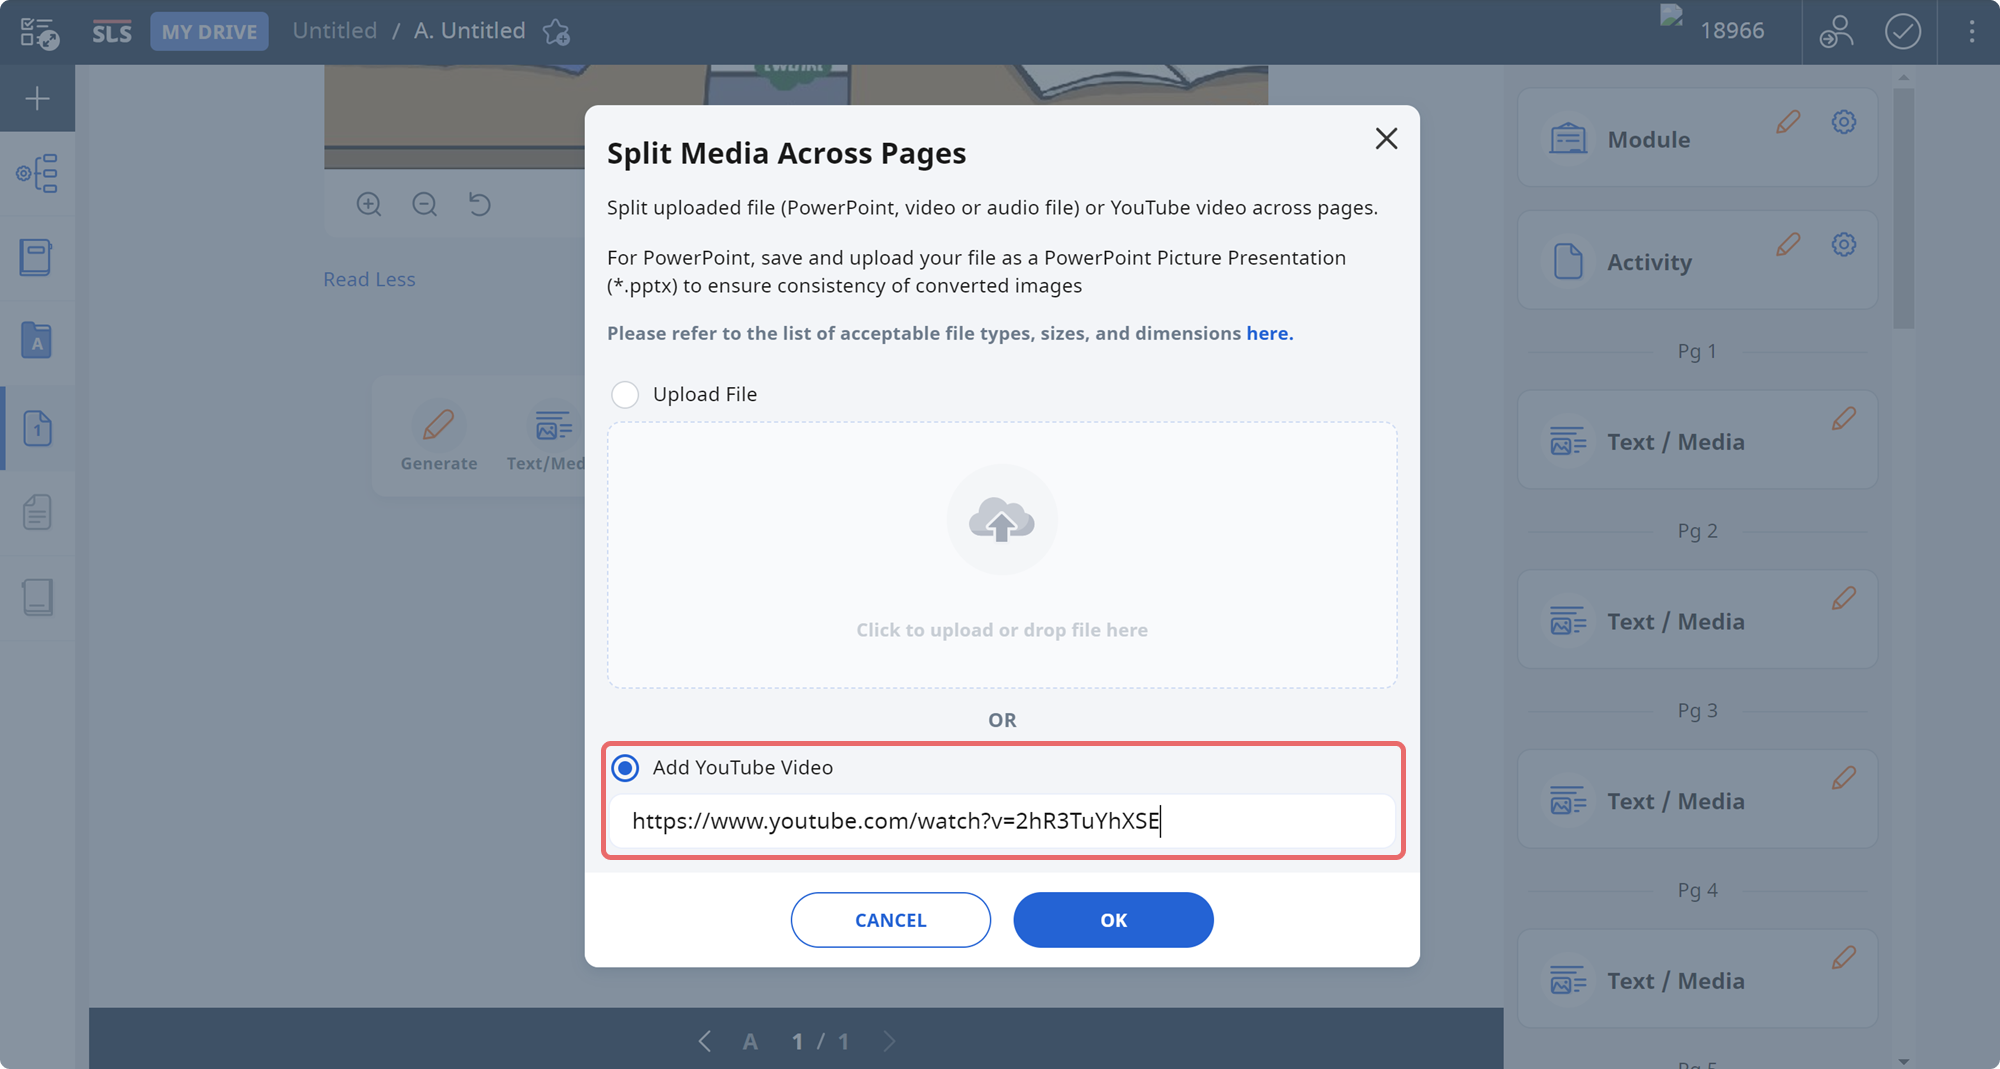
Select Add YouTube Video and insert the YouTube URL. Click OK to proceed.
-
Click Add Timestamp to split the video into multiple pages.
-
Click Split and then OK to proceed.
Generate Transcript for Video/Audio
You can generate transcript for video/audio. Refer to Insert Transcript for Video/Audio.

